“Eco” is a bit of a buzz word at the moment – and with good reason! As a society we’re starting to really understand the impact we’re having on our beautiful planet, and so it’s really great that we’re all starting to shift to a more conscious awareness.
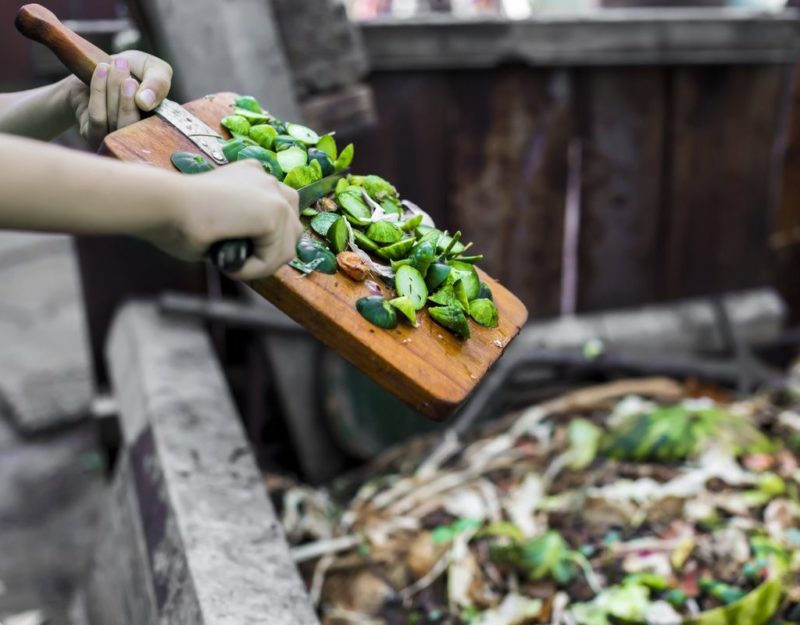
A fantastic way to keep your waste down (and fill the rubbish bins less – always a bonus!) is to compost your food scraps. Composting is basically nature’s ultimate recycling! It can seem a bit daunting to begin with, but actually composting can be quite simple once you get going.
The main thing to keep in mind when starting anything new is to keep is simple and achievable. By all means, go ahead and build some giant compost bins if you feel so inclined – but don’t feel like you *have* to start big. You can buy (or DIY) smaller compost bins as well if you feel that would suit your personal situation better. There are several outdoor and indoor compost bin options available these days, so do a bit of research and decide what will best fit your needs.
When building your compost, think of it a bit like a recipe – it needs a good mixture to come together perfectly. A good compost should be a roughly equal blend of nitrogen (greens) and carbon (browns). Examples of “green matter” are: fruit & vege scraps, coffee grounds, egg shells, tea leaves and grass clippings. “Brown matter” could be things like: twigs, newspaper, leaves and sticks. Avoid adding the following to your compost: dairy, meat, bones, bread or diseased plants or weeds as this can attract pests like rats (no thanks!) or spread the plant diseases. However! Some composting systems (such as Bokashi) are able to take meat, dairy and bones – so if you throw out a lot of waste like this, it may be worth looking into those systems!
To get your compost working as efficiently (and quickly!) as possible, try to break everything down smaller than the size of your finger before adding to your compost. You can also add a bit of existing compost in as well to speed things up. Keep layers no thicker than around 10cm, and add a bit of water with each layer. Once you have a bit of a “lasagne” effect going, give it a wee mix. The whole process should take around 6-8 weeks, and once ready, your compost will look dark brown and smell earthy.
Quick tips to make composting more achievable
Keep a “scraps bin” in your kitchen – I’m much more likely to compost my scraps if it’s convenient, so we have a wee basket that sits on our counter for scraps and coffee grounds, then once it’s full I take it out to the compost bin. Some people prefer to keep theirs in a container in the cupboard under the sink, which works well too – it’s all about what works for you!
Have a visual list of what can be composted and what can’t – When you’re just starting out it can be tricky to remember what can go in and what shouldn’t, so to save yourself the hassle of whipping your phone out to Google all the time, print out a list and stick it on your fridge (or on the side of the container you’re using for scraps!) for quick and easy reference.
Just start! – You don’t need a fancy system or giant in-built Pinterest-worthy pallet bins to compost. You also don’t need to be a gardening whiz or seasoned homesteader! The best way to get started is to just start.
The benefits of composting make it so worthwhile – it’s definitely something to try this spring!
See more:
 Written by Bunny T
A mama of two who advocates for mental health awareness (yes girl!), Bunny is a badass babe blogging about womanhood, motherhood and the adventures that happen in between. You’ll usually find her exercising (running after kids), partying (drinking coffee) and rocking out (sleeping).


Leave A Comment
You must be logged in to post a comment.